
I've had a lot of questions lately about how I created some of my images, so I've decided to publish a regular series of blog posts titled "How Did You Get That Shot?"
The first one in this series is: Changing A Reflection.

This image was created as part of my 365 project. The prompt for the day was: A Reflection Of Me.
There is a great post over on the Capture Your 365 blog by Jeannie Thiessen titled How To Create A Multiplicity Photo. The end result is the same as mine but I used a different method to get there.
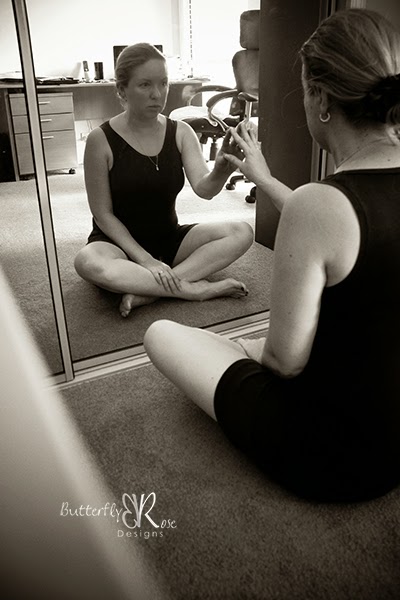
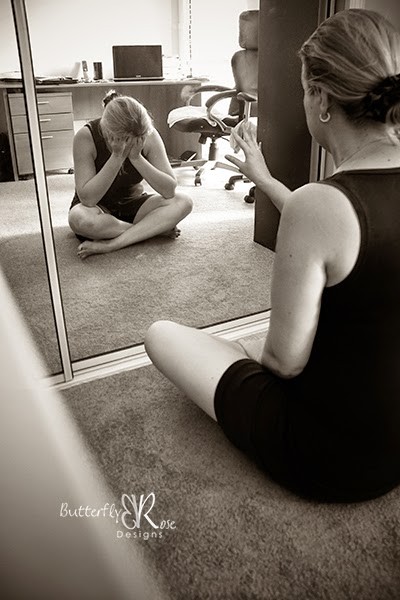
Here's my version:
You don't need a lot of space for this type of shot. My images were taken in our home office on the floor between a desk and a filing cabinet.
The most important thing to remember when doing a composite photo is to keep the camera in the same place. If the camera moves between shots, then the layers will not match up during processing.
I placed my camera on a desk. At first I was using my 50mm lens, but because I was in a small space, only a small part of me could be seen in the image. When I changed to my 18 - 200mm lens set at 18mm, I could fit more into the frame. My settings were: f4.5, 1/15 sec, ISO 2000, 10 sec timer. I kept my ISO high even though the camera was in a fixed place. This was because I didn't want my shutter speed any lower in case I moved during the shot.
My first shot was the space without me in it.
The next image was the one I wanted to have as my reflection. I sat away from the mirror to ensure there was space in front of the mirror, because that was where I was planning to sit for the next shot.
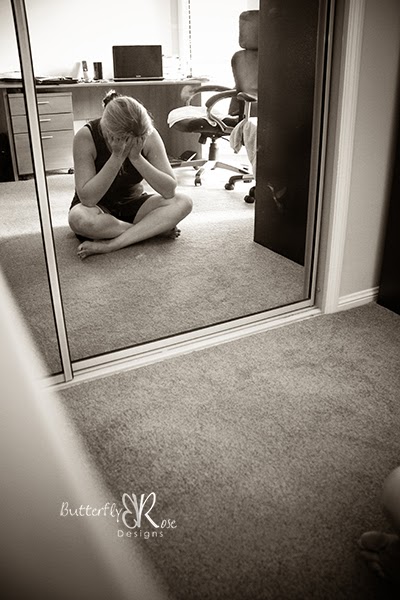
For my third and final shot, I positioned myself close enough to the mirror to touch it.
The next part involves processing the three images in Photoshop to create one final image.
Firstly, I opened the image that I wanted to use as my reflection and labelled it as 'Behind Mirror'.

Next, I placed the image without me in it above the first layer and labelled it 'Empty Mirror'.
Finally, I added the last layer which is the image of me touching the mirror and labelled it 'In Front Of Mirror'.

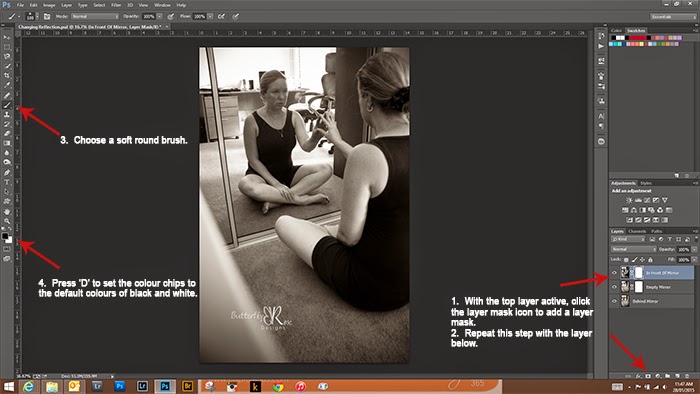
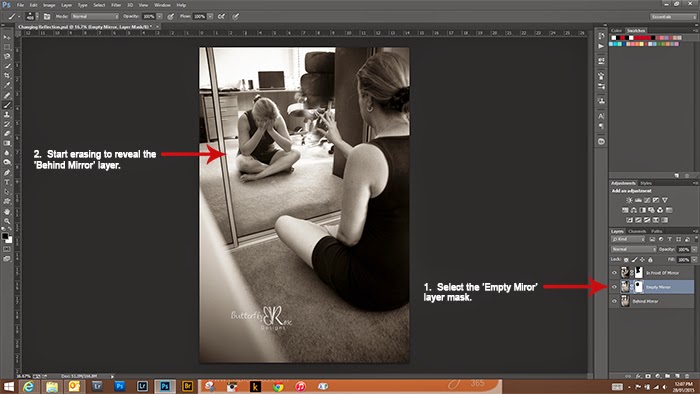
The next part involves Layer Masks. I love using Layer Masks as they are a non-destructive way to erase part of an image. You simply 'mask' instead of erase. If you make a mistake, you can swap the colour chips to paint back the parts you've masked or you can delete the mask and the image remains unchanged.
To add a layer mask, simply click the layer mask icon at the bottom of the layers panel and a white rectangle will appear next to the thumbnail on the active layer.
Repeat this step for the layer below.
Choose a soft round brush from the brush picker. Then press 'D' to set the colour chips to the default colours of black and white.
The next part is where the magic happens.
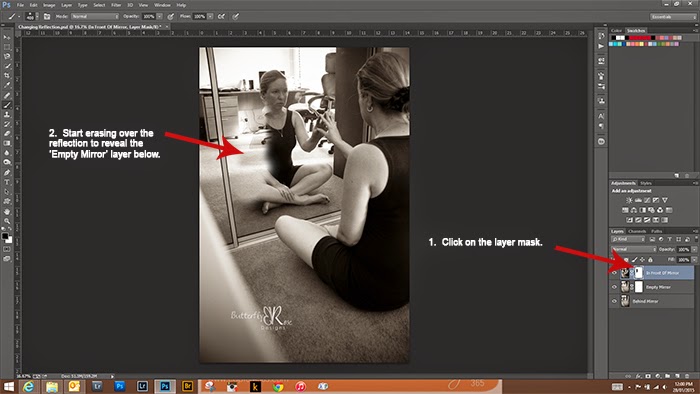
Select the layer mask in the top layer labelled 'In Front Of Mirror'. Start brushing away the reflection part in the mirror to reveal the 'Empty Mirror' layer below. If at any time you make a mistake, simply press 'X' to reverse the colour chips, then brush in the part you want back.
Once you are happy that the reflection is gone, select the layer mask in the 'Empty Mirror' layer and brush away the empty space to reveal the reflection in the bottom layer.
And there you have the final image.
Have fun creating!


No comments:
Post a Comment
Thanks for visiting my blog. I really appreciate your comments.
Nikki